|
|
Post by Slacker on Oct 27, 2007 6:57:53 GMT -8
VERY nice Michael ...... looks awesome .
|
|
|
|
Post by msrwerks on Nov 11, 2007 19:53:55 GMT -8
a short update... received the aux fuel tank wednesday   got the replacement frame steel from a place online (onlinemetals.com i think it was) had to cut it with an air cutoff wheel, but i took my time and i think it all came out ok.    i am going to take the new spring hanger and replacement frame piece to a welding shop to get the hanger welded on. my welder is not big enough to weld both of those together. then the old gets cut out and the new gets welded in. when corey gets done with the trekker conversion i will set it on the mounts and then weld in the 2 body mounts that go on the new piece. |
|
|
|
Post by Slacker on Nov 13, 2007 16:58:31 GMT -8
love the tank .. you'll love it 2 ...
and NICE cuts ..
|
|
|
|
Post by msrwerks on Dec 8, 2007 20:39:07 GMT -8
trying to get everything ready for the conversion shipping soon aux tank brackets made and por15'ed with the rest of the frame. aux tank installed.  out with the old section of frame (this is the same area corey just replaced on his project. mine was in a lot worse shape. i wonder if rust in this area is common for these?)  in with the new...  going to have one of the local welders stop by and go over my welds just in case when the conversion gets here i will weld the 2 mounts back on. |
|
|
|
Post by b4runner on Dec 8, 2007 22:15:23 GMT -8
just curious if you are going to consider some fish plates (or whatever they are called) along your splices? Nice welds BTW ;D I can't seem to get my wife talked into a welder and wiring 220 in the garage  What size springs are you going to run in the rear? I had a similar aux gas tank in my '86 4Runner and when full it the rear end sagged pretty bad... One more thing: the line-x looks awesome, I would love to do that too. Are you going to do the inside of the bed too? |
|
|
|
Post by msrwerks on Dec 9, 2007 12:11:38 GMT -8
hi... i am ordering the downey 3" lift spring packs (all 4 and the matching shocks), and was considering their single add a leaf's for the rear. i am going to weld 3" wide x 1/8 or 1/4 plates over the seams just because of the section that was replaced. (spring hanger plus 2 bed mounts go in this section) and the added support cant hurt anything when you start adding up everything and the amount spent to get the welding done plus your time it takes to arrange everything you will find you could have bought the welder and the 220v wiring for it very quickly keep track of it then argue your case! you can also build your own welder. google "homemade welder" there are several DIY instructions out there (even one on pirate 4x4) about how to make an alternator into a welder. i was considering line-x'ing the inside of the trekker along with the sound deadening insulation under thick carpet until i talked to corey on the phone. he suggested covering the sides with some cloth and remaking the headliner so the rear of it wont have the echo when you drive. (keeping the insulation and carpet) so for now i will just get the outside done and figure out the inside of the trekker part after it is running, moving and stopping i am also going to need the rear seat frame measurements from someone who actually has an original rear seat. i am most interested in keeping it original so when it is flipped down it will be flush with the rest of the bed. thanks! michael |
|
|
|
Post by b4runner on Dec 10, 2007 9:38:45 GMT -8
Kind of thought that you had it covered, mainly curious.. thanks for the advice on the welder. I will do a searc for the home made welder. My dad said he had a wire feed I could have but I guess I waited too long and one of my brother in law's got to it first... Here are some rear seat measurements that I posted for another member. Hey Travis: I kind of forgot to take some pictures/measurements for you but here there are incase you wanna try making your own back seat. 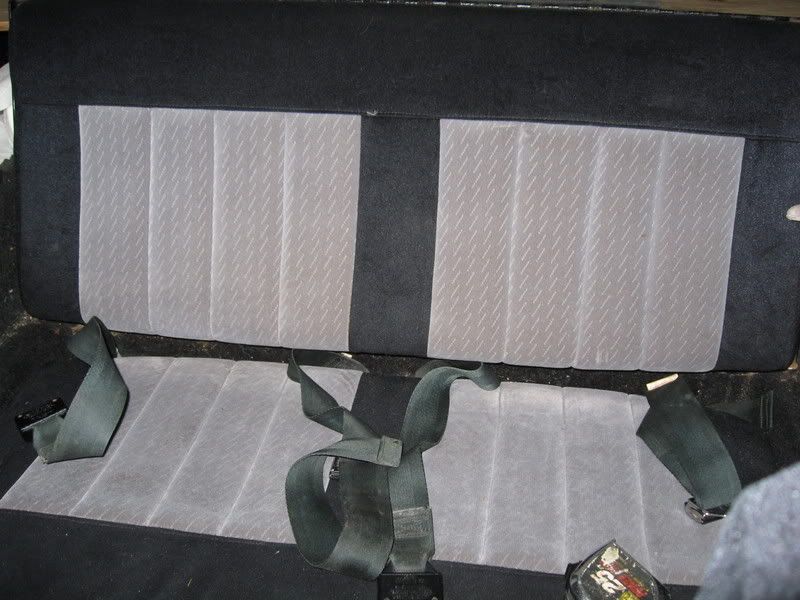 Seat bottom is 18"x36" and using 1/2" plywood, not sure how much foam, seems like 2" thick. Kids (10 year olds) seem to think it is ok for a couple of hours The seat back measured 14x38" (1" overlap on each side to allow it rest on the lip) and uses a 3/4" square tubing frame. The fold over part is 15x38" also made of 3/4" sq tubing. It is attached to each other with a piano hinge where it folds and also to the bed of the truck. Not sure how much steel is there. As you can see by the one picture mine needs to be redone at some point.... I am debating about making a split frame to allow for one side to fold down for 3 passengers and more space for camping crap..  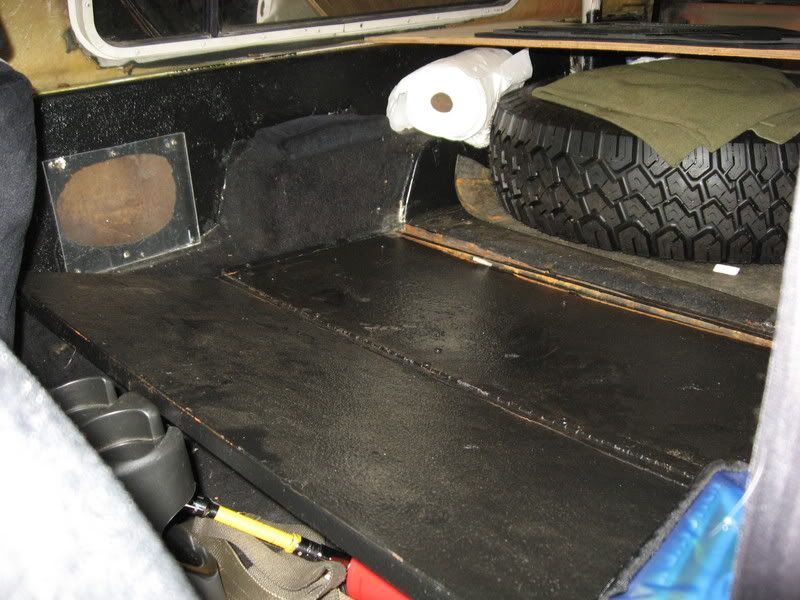 Please ignore my plexiglass speaker hole covers--another thing on the list to fix... Hope this helps you out in your quest for some back seats... I am actually thinking about making a split fold down rear seat as sometimes I seems like I have got three in the Trekker and could use the longer room...my piano hinges have kind of had anyway so...Need to get my front suspension and dual cases in first... ;D I am sure you can't wait to get your Canadian shipment  ...I would end up driving up there myself to get it, but only about a 9 hour drive for me... Robb |
|
|
|
Post by coryc85 on Dec 10, 2007 11:17:53 GMT -8
The Line-X looks great, can't wait to see this thing finished. One note, I have the downey 3" springs on my truck, fronts seem to be ok, but the rears are WEAK. If I put anything in my bed, the sag. I know you only mentioned fronts, but downey quality seems only so-so to me. If were buying springs again, I would skip downey.
|
|
|
|
Post by msrwerks on Dec 10, 2007 11:19:44 GMT -8
hi robb... when i had first started getting shipping quotes i got a quote from fed ex for over $2400. i did the math and figured out it would cost me $1500 to drive it up there and put it on myself, then drive it back. luckly corey got shipping down to a more reasonable rate so it is cheaper to have it shipped then for me to drive up from texas thanks for the info on the seat! so it is 1/2" plywood, 3/4" steel tubing, piano hinge attaches the rear of the back seat to the fiberglass (? or is there steel under that fiberglass there for screws to have something to bite into?) and attaches the extension to the top of the back seat. i guess i will have to wait to build this until i actually have the conversion installed. it is on the list for sure, but there are so many other things before it at the moment michael |
|
|
|
Post by coryc85 on Dec 10, 2007 11:22:19 GMT -8
Oh, and Robb, if your circuit panel is in your garage you can add 220 pretty easily yourself for just the cost of a double pole breaker, a 220 outlet and some wire. My panel had a blank outlet box right next to it so it was just begging me to throw 220 in there. I have a 220 stick welder which I think is capable of doing a good job if it just had the proper user.
|
|
|
|
Post by b4runner on Dec 10, 2007 16:52:45 GMT -8
Michael:
there is a metal strip underneath that the hinge screws into. Looking at the frame the Corey built you he might have even made a provision for that, though not sure...
Glad to hear that Corey saved you some $$$ on the shipping. Not sure how much this whole project is costing you, but I am sure that having to shell out $2400 to get it shipped might put a damper on it...This is a project that I am looking forward to seeing..Only one is the world!
mini Hijack-->Coryc85...I actually just checked my breaker box and am in luck, there is a double pole 220 breaker set up in there already, never paid much attention but figure that it is left from when the previous homeowner converted the hot water heater to gas...so might be able to do it down the road. A Good friend of mine though has offered to help me out with doing a ton of work on my truck...he welds for a living and has a lift...
|
|
|
|
Post by msrwerks on Jan 10, 2008 11:00:10 GMT -8
arrived jan 7, 2007 crate looks to be ok and from what i can see, the rest of it looks ok. i will know more once i get it home and un-crate it for line-x'ing! on the trailer and headed for home to un-crate the sides and top so i can remove the hatch and weather stripping. going to line-x 1st thing saturday am (1-12-2007)  |
|
|
|
Post by Slacker on Jan 10, 2008 16:58:57 GMT -8
Fingers X'd .... I hope everything is damage free .
|
|
|
|
Post by msrwerks on Jan 11, 2008 5:28:45 GMT -8
from what i can see having taken the front and back off the crate, everything looks good. i was debating on sawing the sides and top off of it and leaving it clamped to the bottom of the crate, but i ran out of light i think it would come out of the trailer easier if the sides and top were not in the way at line-x tomorrow. that is this afternoons project! corey... question... on the front of this where it bolts or rivets to the cab of the truck. should i have them line-x this area or just wrap the line-x around the edge and stop? will it cause sealing issues if the whole area is done?   |
|
|
|
Post by Slacker on Jan 11, 2008 7:17:50 GMT -8
I would leave it .. I dont think the "seal" in the box ... would stick to the line x , and may cause leaking .. I would line x the top lip/edge and call er' good .. this is a sore issue with ALL trekkers .. they all seem to leak at this spot .. I dont believe the seal is good enough .. when you put it together , I would recommend some windshield Urethane undernieth and all around the seal . ohhh .. and your son looks like hes very excited |
|


 ...I would end up driving up there myself to get it, but only about a 9 hour drive for me...
